fredag 27. mai 2011

PLA Review - supply3dpla.com

More filament suppliers is always a good thing, even more so when they are shipping from a location near you. After seeing a small advertisement on the RepRap forums, I chose to try out the PLA from supply3dpla.com who are located in Sweden.

First, the postal service managed to ship my package to Denmark, but Bo was very forthcoming, and shipped the package again. Total shipping time to Norway was 6 days, including a 4 days (unnecessary I might add) delay at customs. If you live in Norway (and outside the EU?), you can ask for the VAT to be removed, shaving a few € off the total price.


I ordered 400g of both the red and the blue, and got some samples of the transparent and black color as well. These are the only colors they supply at the moment, but Bo told me they plan to supply both green and yellow, and perhaps ABS.


How is the quality?

All the filament is "soft/smooth" to the touch, and feels quite bendable and "fresh". The diameter was a pretty consistent 2.88mm-3mm, and a bit oval. I forgot to compensate for this in Skeinforge 41 - dimensions, but the prints are looking very good, though it spit out a tad too much plastic now and then.

The PLA extrudes very easily at 185deg c, not needing a lot of tension on the extruder. All colors behave the same, as far as my small testing goes. It also stick very, very well to the heated build plate with glass @40 deg. So well in fact, that I pretty much have to clean with acetone after each build to get the stuff off.

What does it look like?

The colors are difficult to describe, as they are not a "pure" color, but rather a mix between several. I'll try my best with photos in different light conditions.


 The "red"           

In filament form it's very transparent, and looks delicious. When extruding it's almost completely transparent, and you need a couple of layers to really see the color. The final color is a kind of mix between red, orange and pink. I was hesitant at first, but the color is growing on me.


 The "blue"           

Just like the red, it's very transparent, and the same behaviour apply. The color is kind of "off" for me personally. It's like a strange mixture between light blue and cyan, and doesn't "pop" like the red one does. I might change my mind, but I doubt it. No UV-reactive goodness either.


The natural

In filament form it's almost 100% transparent, when extruded it's still pretty much transparent. In natural light it gets a bit of a yellow tint, but when you shine a led torch on it, it's quite nice and clear.

Most suppliers sell natural filament cheaper than coloured, but not here. It might be for you if you are incorporating lights in a model, but otherwise I'd go for something more funky.

 The Black           


This one is nice. It's a very deep, shiny completely opaque black filament. I thought the filament I have from ultimachine  was black, but there is a slight difference when comparing side to side. It's difficult to catch it on camera though. Note: The filament I have from ultimachine has been laying around for more than a year, so I don't know how it compares to what they supply now.


Bottom line

The filament they supply is excellent! I'm definitely getting more of both the red and the black filament from supply3dpla. I don't know how easy it is to handle the big 5kg rolls of filament they ship, which might be a downside.

A nice little bunch with 6.8kg of filament from ultimachine just went through customs, so expect a review and comparison of that later on.

-Nudel 

fredag 20. mai 2011

Tips & Tricks - Tape & Layer thickness

Introducing RepRap Tips & Tricks, short blogposts where I share some of the small things you learn when you have a RepRap.
  • Don't tape your PLA filament together! When you're battling with a noncooperative spool of tangled filament, it might seem like a good idea at the time. When you have to degrease the tape residue off 2kg of PLA filament to avoid clogging the extruder, not so much.
  • If you have problems printing at high speed because the layer won't stick to the previous, try lowering the layer thickness under carve in Skeinforge (41). I went from 0.4mm to 0.35mm, and have done near-perfect gears at more than 50% speed increase from before. (Went from 20mm/sec to 33mm/sec).

mandag 9. mai 2011

Mendel-parts.com - v6 hot end first impressions

I've been using the v6 hot end from mendel-parts.com for a couple of days now, and although that is not enough time to do a complete review, I would like to share a few things I've learned.

  • It's working beautifully! I always thought the hardware was to blame for my sub-par print quality, but with a proper hot end and skeinforge 41, I was able to spot the hardware problems. A new belt on the x-axis and metal gears on x and y axis did the trick.
  • I (and I'm not alone) needed to glue the PTFE tube/liner to the brass part to avoid it forming a blob which clogged up the whole thing. I did it by roughing up the surface of the PTFE and the inside of the heater barrel, and put on a very small amount of thermal glue. Take care not to clog the barrel! It seems to be working out nicely. Here's a picture after the first failed attempt at attaching it to a wades. The mounting bracket failed, and both the PTFE and PEEK pushed out of the barrel, resulting in all sorts of funky cleanups.

  • I don't like to glue the thermistor in place. Both because it would be impossible to remove, and because the thermistor I have from ultimachine is too big to fit. I could of course use the thermistor supplied with the hot end, but then I would have to change the temperature table which is not readly available. Anyway, I went with my decision of attaching the thermistor to a ring terminal and replace the copper ring with it. It worked out fine, but the temperature was WAY off. Because I use to weak springs on Adrians extruder, I had to increase the temperature to 205 degrees to get proper extrusion. After a while it clogged up and I found this inside the barrel. (Be warned, it's not pretty).
    •  I now extrude at 180-185 and it works beautifully, I think I could go lower still.
    • EDIT: I have a theory the gunk was bits of PLA the extruder grinded off the filament, and not necessarily the temperature.
  • I didn't damage anything apart from breaking off the filament guide off "driven-holder.stl". Here I'm printing a new "idler-holder.stl" to have a spare.
  • To sum it up:
    • The mendel-parts v6 hot end works great!
    • Glue the PTFE tube to the barrel (carefully).
    • Use strong springs on Adrians extruder.
    • Test your temperatures with natural PLA to check for discolouring.
    • Skeinforge 41 with volumetric 5d is incredible! (Don't waste your time slicing with the old repsnapper windows build that's available).
    • When you turn off the machine, leave the plastic inside. I had no problems extruding straight away when heating it up again. If you pull it out it will most likely form a plug.
Update 01.02.2012: I've used the v6 hot end for a long time, and it's decent. Though because the melt chamber is so large it drools a lot, and the filament lingers a long time when changing colours. The Arcol v3 and J-heads (and others?) has no such melt chamber, only a straight path to the nozzle, which I find is a better solution. This is written only for completeness sake, as the v6 is no longer sold. Though the v9 looks similar, I have not seen it in person and don't know how it performs.

Well.. I'm off to figure out why skeinforge 41 sometimes decides to home during a print. It's no problem when it homes towards the endstop, then it just goes back to printing. The problem is when it anti-homes away from the endstop, trying to push the x carriage or the bed off the bars. I could attach endstops there probably, but that's just circumventing the problem.

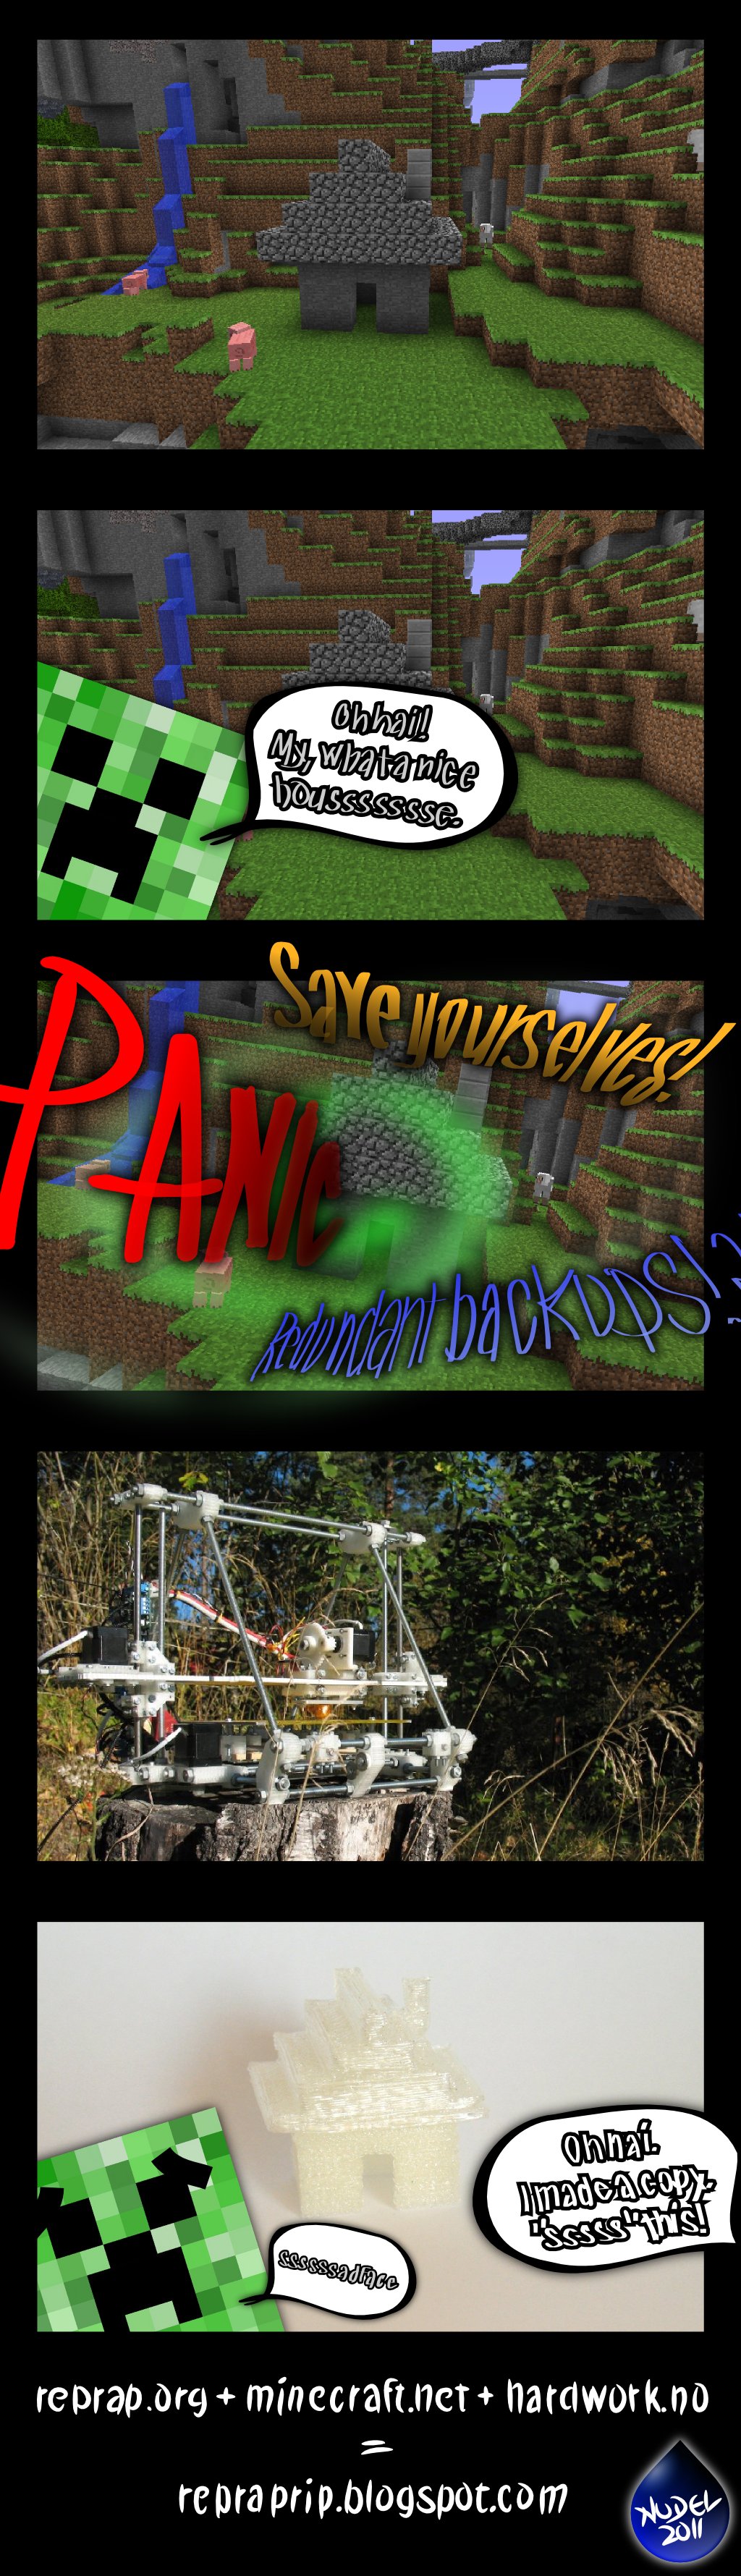
Edit: Oh, and I made a funny Minecraft Creeper Keychain, check it out.
 -Nudel

onsdag 4. mai 2011

Inkscape to OpenSCAD dxf tutorial


As some people are having problems with this, I present a small tutorial, as I believe I have found both an explanation and a solution. Inkscape is a wonderful program, and teamed up with OpenSCAD it makes a lot of cool stuff possible.

It works with Inkscape 0.47 and 0.48 without no extra plugins.

Update 2012.06.01 : Changed code on step 9 to use the preferred child import().
Update 2012.09.16 : Added information about "add nodes" on step 6.
Update 2012.10.09 : Added information about "flatten beziers" on step 6. Thanks to zeptomoon for the suggestion!

If you don't want to read my ramblings, the trick is easy: Make all the curved segments lines before you export to dxf.

Now, commence indepth tutorial:


1 First off, let's make a simple object, like this ellipse.

Note the square and round handles on the object, which indicates this is an .svg style object which you can modify according to the specific rules of said object.


2  This is of course no good, as OpenSCAD / dxf can't read this format. What we need to do is convert it to a path. [Shift+Ctrl+C]


3  Select the node tool [N], and notice how the handles on the object now look like gray squares. This indicates we now have a path.


Drag-select, or press [Ctrl+A] to select every node. With the nodes selected, notice how the handles changed again. The lines with spheres at the end tells us the segments between the nodes are curved. (Try fiddling with the points if you like).

This, again, is no good for the standard .dxf plugin in Inkscape, which only exports straight lines. (See point 8).


5  With every node selected, press the indicated button to "Make selected segment lines".

The lines with spheres on the handles are gone, so we now have only straight lines between the nodes. This would work, but doesn't look very smooth, does it? Undo your last action and continue to next point in the tutorial, where you learn to do it the right way. (Sorry about that).


6  With every node selected, initialize some mouseclicking action on the indicated button "Insert new nodes into selected segments".

This, well, inserts new nodes into selected segments, following the curve.

Press a few times if you want a smoother object, but don't overdo it now, you hear?

You could also use "Extensions - Modify Path - Add Nodes" for dense, even distribution of nodes all over complex parts.

Even better is to use "Extensions - Modify Path - Flatten Beziers", which will only add nodes at curved areas, resulting in less useless nodes. A value of 0.3 is a good value to start with. Thanks to zeptomoon for the suggestion!


7  Feel free to once more click "Make selected segment lines".

This looks much better. The lines are straight, but due to the sheer numbers, they simulate a curve! Victory!

You can of course select only part of the nodes, if you only want part of the model smooth.


Now save the file as "test.dxf". You will need to select "Desktop Cutting Plotter (R13)" in the type drop down box.

Notice the help tells us we can only export certain elements. What we have done now is create only lowpolylines, which exports beautifully.


9 Start up OpenSCAD and use the following code to open up the file. (You need to put the .scad and .dxf file in the same directory).
linear_extrude(height = 10) import("test.dxf");
There you go! Enjoy your Inkscape paths in OpenSCAD.


10  This works fine with any objects, advanced or not. Just remember to union the different paths.

Also note the part "Rap" is not just white text, it's a proper hole made with difference.

You can of course export several .dxf files and combine them in OpenSCAD if you need different height on some parts.

It can sometimes be difficult work with the .dxf file in OpenSCAD, as Inkscape exports the entire page, and it can be a bit tricky to locate where the object are. I recommend you select everything, go to Document Properties [Shift+Ctrl+D] and "Fit page to selection".  Edit: See below. The problem is a bit difficult to explain, but you'll understand it once you have experienced it.

Take care not to overwrite your original .svg file if you want to be able to edit things later. It's much easier to work with objects than paths.


Edit 16.09.2011: I have found it easier to align the objects to point 0x0 (the bottom left corner of the page in Inkscape) and not center the object in OpenSCAD. Then you can easily stack several .dxf files in different heights.


Now go forth and make something awesome! Remember to share your .svg files on thingiverse, to go with the .scad files!

I hope this helped, and clarified some things. If you have further questions or suggestions, feel free to comment.


-Nudel 

mandag 11. april 2011

Mendel-parts.com - New v6 hot end and positive experience.

I cringed when I read Camiels post at the mendel-parts.com blog the other day. It's easy to see the frustration, and he does have a valid point about the negative feedback getting the most attention. As I received a package from mendel-parts today, I'd like to share my positive experience with you, while I make a first-impression preview on their new v6 hot end design.

My order was in the €100+ range, which included a 5mm alu printbed and a few spares of the older simpler hotends (now discontinued?), because I know I can get that to work (at least for a day or two). I also ordered a bunch of bootlace ferrules, as I only seem to find insulated ones on ebay for some reason.

The most interesting item though, is this.


This is the newest v6 hot end design from mendel-parts.com, and it looks like it has great potensial. It's machined beautifully, and has a good deal of weight to it. The added weight might have an impact on a theoretical maximum speed, but my main goal is stability over speed anyway.

The only part I don't like is the thermistor attachment, as I don't trust kapton tape, and neither would I like to glue the thermistor permanently to the block. We'll see if I manage to build up the courage to tap a new hole and use a ring terminal with the thermistor on instead.

Another thing I'm a bit curious about is the gap inside the heater block, between the nozzle and the inlet. I have always understood the inside of the hot end needed to be a smooth as possible to decrease the pressure needed to push plastic through. This design have some pretty big threads where the plastic will pack up, and most of us have probably fought with hardened PLA. Yes, I understand they get the design to work very well, though I don't know if this gap has any down sides, especially regarding long time reliability and cleaning.


Edit: I have the peek block the wrong way around in these pictures. More info from araspitfire here.

Back to the order and lead time discussion.

I put in the order 3/26, got a manual order confirmation 3/31, and the package was shipped 4/6. According to the excellent UPS tracking system, it took less than 8 hours to ship the package the ~1000km from the Netherlands to Oslo. It then took 4 days to ship it the last ~100km from Oslo to me, let's blame the weekend for that. All in all I must say it was pretty good!

In total it took 16 days to receive my order, of which 5 days was in transit. I ordered on a Saturday, so the first working day was 28/3. Is 9 days of lead time something to make a fuzz about? I really don't see why people complain. I'd also like to add that they sent me a new printed baseplate for the v6 hotend for free, which they really weren't obliged to do. That's great service!

Some people will probably mention it, and I'd like to agree in advance; this wasn't a complete mendel kit, which may have a longer lead time. But for those of us who have a mendel in our possession, it's irrelevant, because we're mainly interested in fast dispatching of spare parts anyway. And in that regard, I approve of mendel-parts.com, and recommend them as a webshop who delivers what they promise: high quality parts, and a decent lead time.

Update 01.09.2012: Mendel-parts has been getting a lot of bad press over a long period of time, and although the grief is mostly about Orcas, I can not recommend shopping with them until they fix their issues. For high quality extruder hot ends, check out J-heads at hotends.com and Arcol versions at arcol.hu.

Now I'm looking forward to trying out the slick v6 hot end! A proper review is coming up when I have some experience with it running, and made up my mind about it.

-Nudel

tirsdag 8. mars 2011

A coalition of obsessions.


You like?


torsdag 13. januar 2011

Small (35mm) fan for extruder cooling.

I've been looking around for a small fan for my extruder, but most of the cost about $10 + shipping which I felt was a bit too high.

But dealextreme came to the rescue with a replacement fan for the Nintendo Wii. It only cost $3.60 including shipping, and I just received mine. It is not the most powerful thing, and I have yet to mount it, but I thought this might be of interest to others.


Dimensions are 35x35x15mm and it runs off 5v. The black lead is negative/ground, and the gray is positive. It comes with a small connector which you remove by lifting (hacking off) the tiny tabs. There are mounting brackets on the side, but they can easily be cut off if needed.